Audience, registration, and event-day how-to
This chapter explains the organizer workflows for invitations, tickets, registrations, discount codes, people segments, attendance, check-in, scholarships, volunteers, media applicants, and attendee-facing exceptions. Attendees and onsite staff should also read the attendee guide and check-in staff guide.
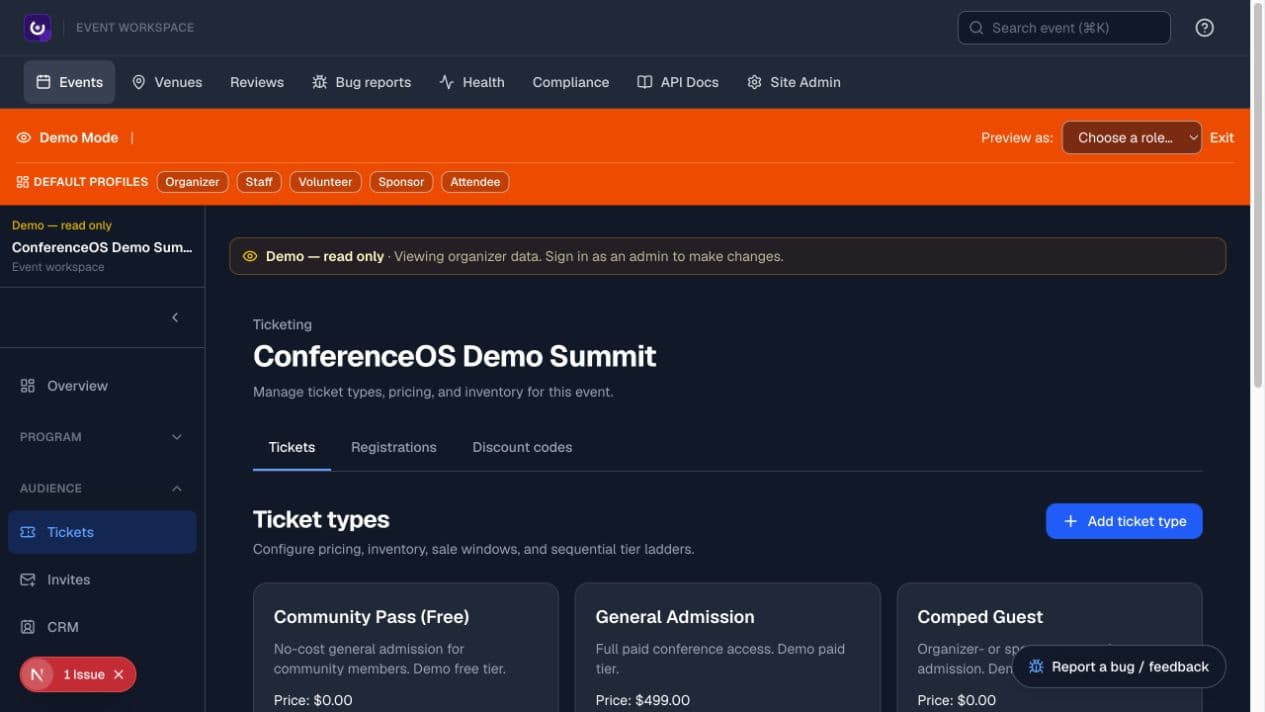
Figure 1 — The ticket workspace brings eligibility, price, inventory, sale windows, sold counts, and holds into the current event scope.
Understand the audience records
ConferenceOS separates several related facts:
- a ticket type is inventory and eligibility;
- a registration is a person's event enrollment and payment state;
- attendance records whether the person actually participated;
- a CRM subject is the event-scoped relationship workspace;
- an invite, scholarship application, volunteer signup, or media application is a request or acquisition path, not automatically a confirmed registration.
Do not treat one state as proof of another. In particular, a signup, checkout hold, or invitation is not a confirmed registration, and a confirmed registration is not a check-in.
Create and verify ticket inventory
- Open Audience → Tickets.
- Create or edit each ticket with a clear name, description, price, quantity, attendee role, and optional sale window.
- Verify complimentary, scholarship, virtual, or tier relationships only on tickets intended for those paths.
- Compare total ticket quantities with event capacity and venue constraints.
- Review sold counts and active checkout holds before reducing inventory.
- Test the signed-out registration page in the intended payment mode.
Expected result: only eligible, in-window inventory is selectable. A ticket can be visible without producing a confirmed registration when checkout or validation has not completed.
Open registration and test the complete journey
- Confirm the event status and registration-open setting.
- Confirm Stripe mode when any ticket is paid. Demo Mode never creates a live checkout.
- Open
/events/<event-slug>/registersigned out. - Select an organizer-approved test ticket and enter non-sensitive test data.
- Complete the provider flow only in the approved mode.
- Verify the confirmation page, registration state, email delivery evidence, and QR code or transfer controls expected for that event.
- Remove or clearly label the test registration according to operator policy.
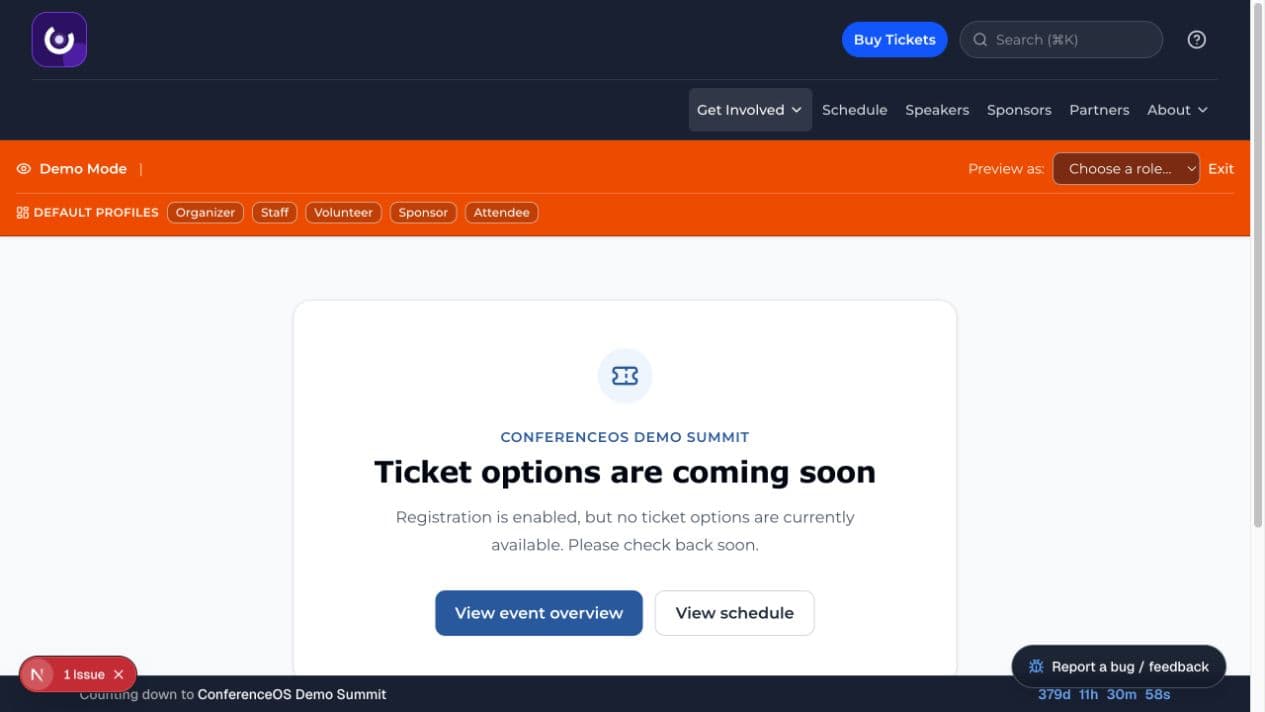
Figure 2 — Registration fails safely when a sale window is closed or no eligible inventory exists, instead of pretending a ticket was reserved.
Manage registrations
Open Audience → Tickets → Registrations.
- Search by the information the attendee supplied and confirm the event.
- Read ticket, payment, confirmation, transfer, and attendance state before changing anything.
- Use the supported action for the specific problem; do not edit unrelated fields to force a desired display.
- Read back the result and, for provider operations, verify the provider's corresponding record.
- Record an operational note or support case when the exception needs follow-up.
Refunds, transfers, complimentary registrations, payment corrections, and inventory overrides affect customers or money. Verify recipient, amount, ticket, event, provider mode, and resulting state immediately before the action.
Create and use discount codes
- Open Audience → Tickets → Discount codes.
- Create a code with a deliberate name, discount type/value, validity window, usage limit, and eligible ticket scope.
- Save and test it against an eligible ticket.
- Also test one ineligible or expired case so failure behavior is known.
- Monitor usage and disable the code when the campaign ends or exposure is wider than intended.
A code changes checkout price only when every configured rule matches. It does not create inventory, override a closed registration period, or guarantee a registration.
Send and manage invitations
Use Audience → Invites for event invitation lists and claim links.
- Create or select the event-scoped invite list.
- Add only authorized recipients and check for duplicate or incorrect emails.
- Configure the intended ticket or claim behavior.
- Preview the message and verify the event, recipient, link lifetime, and external-send provider.
- Send a small approved test before a larger distribution.
- Monitor claim status and revoke or replace exposed links.
An invitation is not consent for unrelated marketing, and a claim link should be treated as a bearer credential until redeemed or revoked.
Build people segments
Use Audience → People to open the People query page and define event-scoped segments for reports, messaging, exports, or CRM handoff.
- Start with the narrowest criteria that describe the operational audience.
- Preview the resulting count and inspect representative members.
- Name and save the segment so its meaning and event are clear.
- Recheck dynamic segments immediately before using them; membership can change as registrations, attendance, and CRM records change.
- Export or push to CRM only when the destination and data purpose are approved.
Segment membership is a query result, not a permanent label unless the product explicitly materializes it. A count alone is not enough evidence that the right people are included.
Operate check-in
- Before doors open, confirm the event, timezone, date, venue, staff roles, badge workflow, and escalation owner.
- Open Audience → Check-in or give narrow-role staff
/checkinaccess. - Test QR scanning and manual lookup with an approved record.
- At the desk, match the attendee to the event and registration, read the current status, then confirm check-in once.
- Escalate missing, duplicate, unpaid, transferred, or wrong-event records instead of creating a workaround registration at the kiosk.
- Reconcile attendance totals and unresolved exceptions after the queue closes.
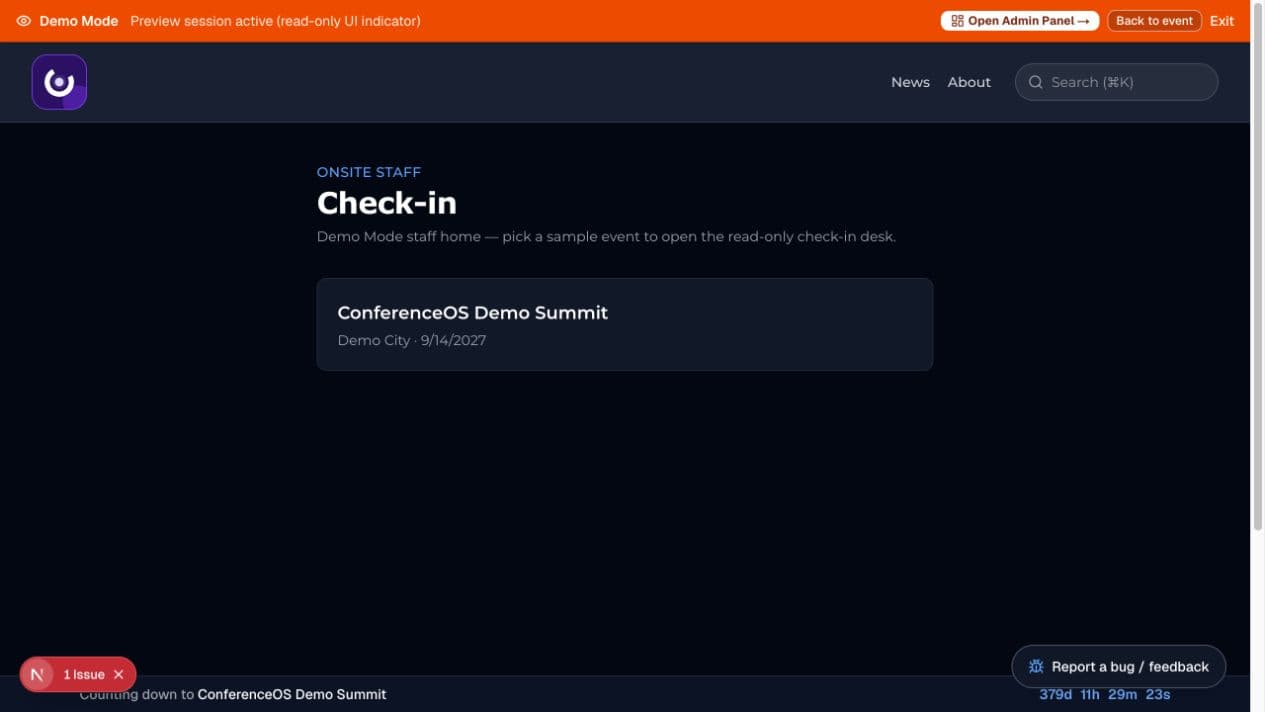
Figure 3 — Narrow-role staff start by selecting the event; Demo Mode uses fictional data and remains read-only.
Expected result: a successful check-in changes the attendance state used by attendance-dependent reports and workflows. It does not change payment or ticket inventory.
Review attendance and export safely
- Open Audience → Attendance.
- Confirm the event and filter or report scope.
- Compare confirmed registrations, check-ins, and any provider-imported attendance rather than combining them blindly.
- Resolve obvious mismatches through the underlying registration, check-in, or virtual import record.
- Export only the minimum necessary columns to an approved destination.
- Store, share, and delete the export under the event's privacy and retention rules.
An export is a copy outside ConferenceOS access controls. Treat it as sensitive attendee data even if the source report was easy to open.
Run scholarships
- Open Audience → Scholarships and configure categories, eligibility, application dates, public instructions, and fulfillment process.
- Test
/events/<event-slug>/scholarshipsand the application confirmation. - Review applications using the event's approved criteria.
- Record the decision and fulfill it through the intended scholarship ticket or organizer process.
- Verify that approval produced the intended registration or claim path; application approval alone is not proof of a ticket.
Keep sensitive financial, identity, or hardship information out of fields that do not require it. Apply the operator's retention rules after decisions.
Run volunteer opportunities
- Open Audience → Volunteers.
- Publish each need with eligibility, benefits, capacity, signup deadline, dates, times, location, and onsite lead.
- Test the public volunteer page signed out.
- Review signups, then assign or decline them through the organizer's stated process.
- Communicate arrival instructions and grant only the narrow access needed for the assigned job.
A volunteer signup is a request, not an automatic assignment, staff account, ticket, or complimentary registration.
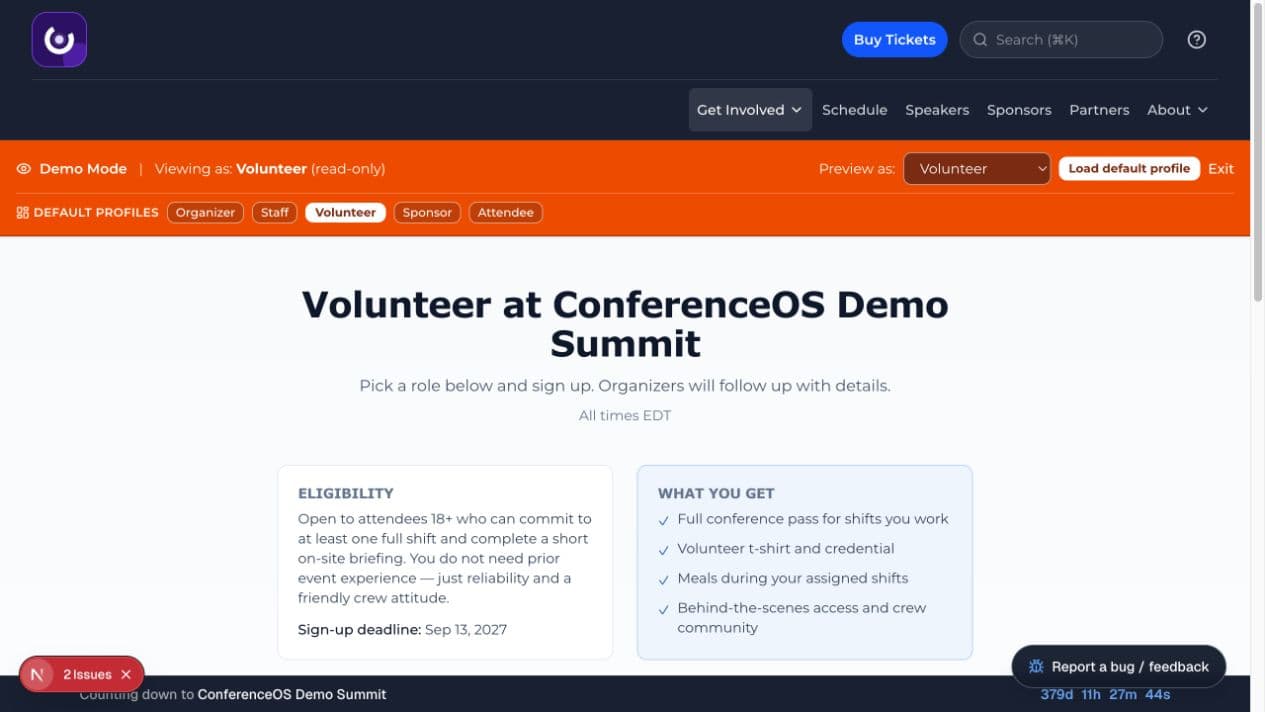
Figure 4 — The public volunteer page explains eligibility and benefits before showing open needs and the signup form.
Manage media and media partners
Use Audience → Media for credential or press workflows and Media partners for partner applications and fulfillment.
- Publish the correct application path, eligibility, deadline, and required evidence.
- Review applications only within the event and collect the minimum necessary personal or organization information.
- Approve or decline according to the event's stated criteria.
- Send access, credential, or resource links only to the intended recipient.
- Revoke exposed bearer links and record fulfillment or check-in separately.
Media approval, partnership, registration, and attendance are different states. Do not imply approval grants unrestricted backstage, attendee-data, or organizer access.
Troubleshoot audience operations
- A ticket is missing: check event sales state, ticket window, quantity, holds, role, and external-ticket configuration.
- Payment succeeded but the registration is pending: verify the provider event/webhook and ConferenceOS record before manually changing state.
- A discount is rejected: verify dates, usage limit, eligible ticket, and exact code; do not create duplicate inventory as a workaround.
- An invite was not received: confirm recipient, provider configuration, delivery evidence, and whether a new token invalidated the old link.
- A person is absent from a segment: inspect the segment criteria and the underlying registration/attendance/CRM state.
- Check-in cannot find a person: search the confirmation email and escalate wrong-event, transfer, duplicate, or payment issues.
- Attendance totals differ: separate onsite check-in, registration, and virtual-provider attendance before reconciling.