Event setup and publishing how-to
This chapter explains how an organizer turns a new ConferenceOS event into a safe public event site. It covers the event record, settings, branding, venue, public-page sections, navigation, tickets, policies, and the final signed-out check. Use the organizer guide for the shorter lifecycle overview.
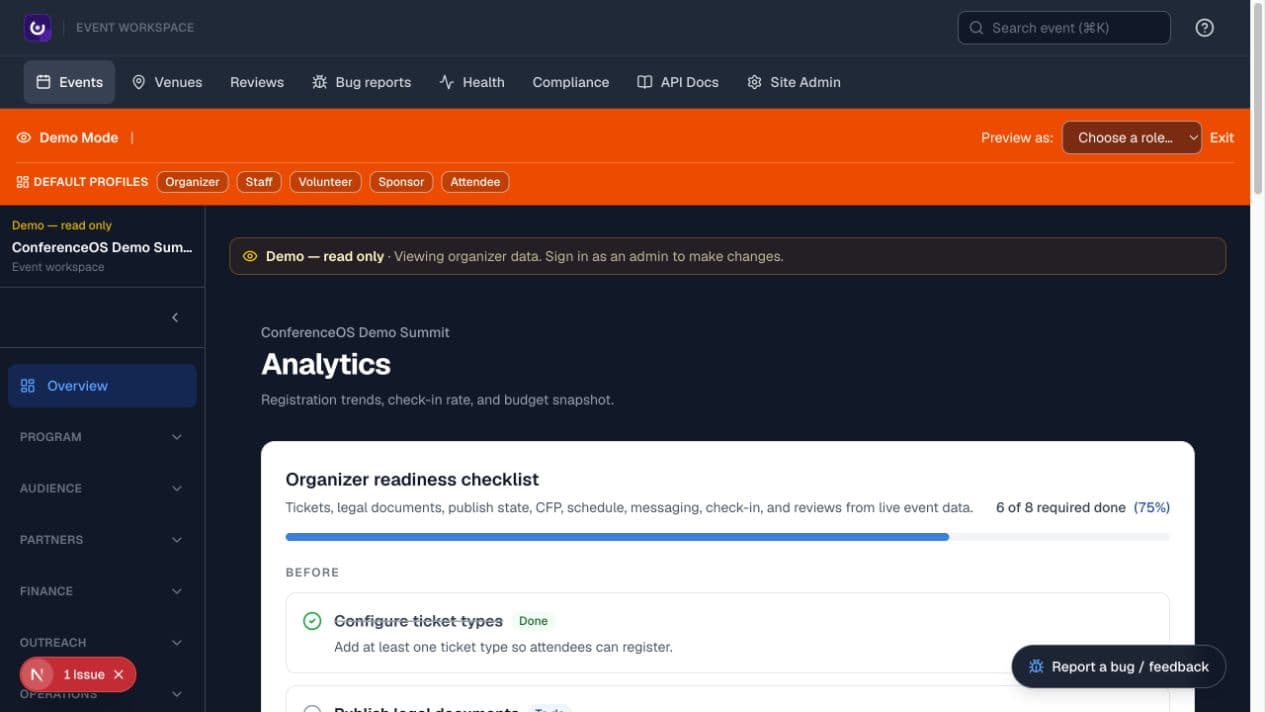
Figure 1 — The event overview is the control point for readiness, current event scope, registration, program, attendance, and budget signals.
Understand what event setup controls
An event record is the scope boundary for almost everything in ConferenceOS: public pages, registrations, tickets, CFP submissions, sessions, sponsors, messages, reports, and CRM activity. Its slug becomes part of the public URL, and its timezone controls how program times are presented.
Event setup does not deploy ConferenceOS, connect provider credentials, write legal policy for you, or make unfinished content safe to publish. Those remain operator or owner responsibilities.
Create an event
Before you start: decide the working event name, URL slug, start and end dates, timezone, event type, format, and whether a venue already exists.
- Sign in as a site admin or authorized organizer.
- Open
/organizer/eventsand select Create Event. - Enter the Event name and review the generated URL slug. Prefer a short, stable slug; changing it later changes the public route.
- Add the description, start date, and end date.
- Choose the event type and In person, Virtual, or Hybrid format.
- Keep the status at Draft while setup is incomplete. Use Coming Soon only when the public preview is intentional.
- Select an existing venue if appropriate, then create the event.
- Confirm that the workspace header shows the correct event before continuing.
Expected result: ConferenceOS creates one event workspace at /organizer/events/<event-slug> and one public route at /events/<event-slug>. The public route may still hide draft content.
Configure event details and visibility
Open Operations → Settings. Settings are grouped into sections so that identity, publication, presentation, operational rules, and integrations do not have to be changed together.
- In Event Details, verify name, slug, description, dates, timezone, format, contact details, and approved external links.
- In Visibility, choose the lifecycle state appropriate to the event.
- Save one section before leaving it. A successful toast or refreshed value is the confirmation; typing into a field is not.
- Open the public URL in a signed-out window. Confirm that draft-only content and organizer controls are not exposed.
Do not use Published as a substitute for completing the readiness work. Publishing changes public visibility; it does not validate prices, inventory, policy content, links, provider configuration, or schedule quality.
Apply branding and build the public page
Branding & Theme controls event presentation. Public page controls the content blocks and their order. Organization-wide branding may supply defaults, but event settings remain the version visitors see for this event.
- Add the approved event logo, hero image, colors, and public links.
- Preview text and images at desktop and mobile widths. Keep important text out of image-only assets so assistive technology can still reach it.
- Open Public page and review every available section.
- Show only sections whose content is ready. Reorder sections with the move controls or drag handle, then wait for the save result.
- Configure the hero call to action and confirm it points to the intended event-scoped destination.
- Review attendee-organization logos and other public assets for permission, accuracy, and event scope.
- Open
/events/<event-slug>signed out and follow every visible link.
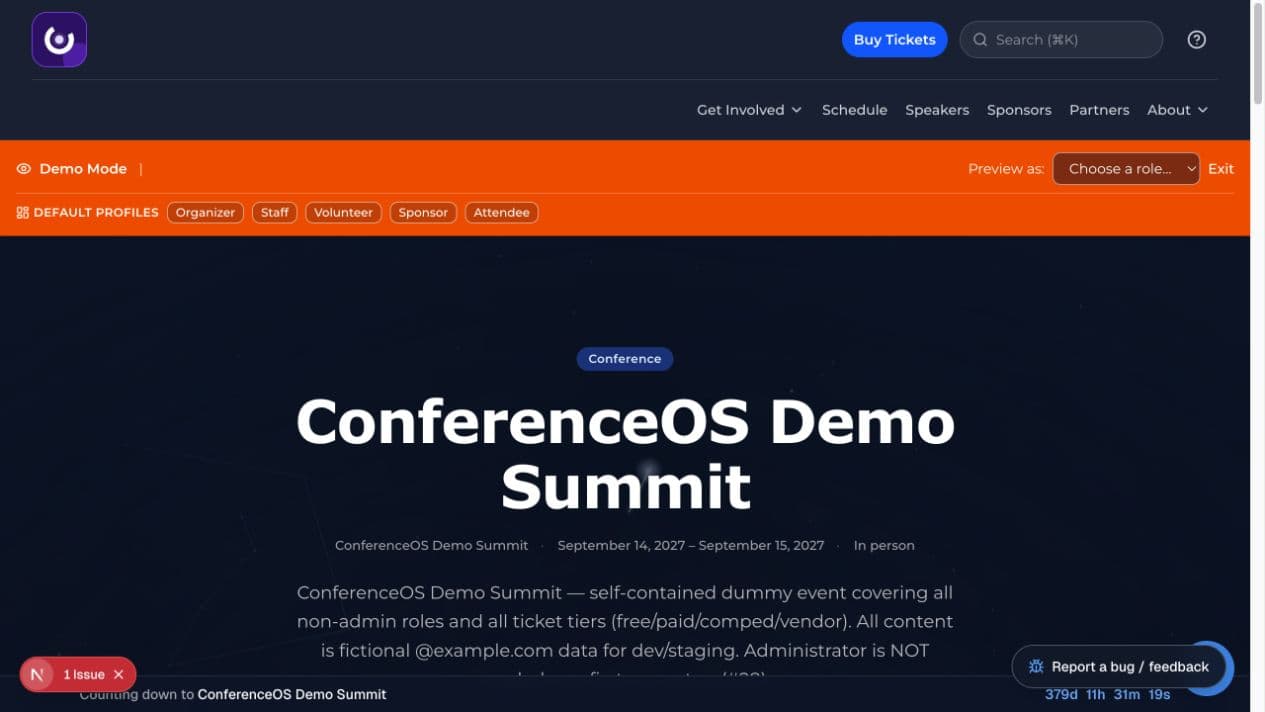
Figure 2 — The signed-out event home is the final truth for what attendees can see: public description, dates, participation paths, program, partners, and policies.
Expected result: the public page shows only enabled sections in the saved order. Hiding a section removes its landing-page presentation; it does not delete the underlying records.
Configure header and footer navigation
Use Operations → Navigation when the event needs links beyond the standard generated public navigation.
- Review the existing event-header items and footer columns.
- Add only approved HTTPS or event-local links.
- Give each link a short label that describes its destination.
- Put registration, schedule, speaker, sponsor, travel, and policy links in a predictable order.
- Save and test the header and footer signed out on both desktop and mobile.
Navigation changes where visitors can click; they do not publish a draft schedule, open registration, or make a private organizer route public.
Manage the shared venue, room, and booth-layout library
Use Venues in the sitewide organizer navigation for reusable physical locations that can support multiple events.
- Add or open the venue and confirm its public name, address, city, region, postal code, and country.
- Expand the venue and add rooms using attendee-facing names, room type, and realistic hard and soft capacities.
- Add booth layouts only when the venue has an approved sponsor-expo plan; verify layout name, booth count, and identifiers against the physical map.
- Edit a shared venue or room only after checking which events rely on it.
- Before deleting a venue, room, or layout, verify the selected row and review its historical and future event use; some confirmation prompts are generic and do not repeat the record name.
The venue library is installation-wide. Selecting a venue for one event still happens in that event's Settings. Use the dedicated Wi-Fi and emergency-contact fields only for approved event operations; do not put private contracts, building access codes, or unrelated provider credentials into venue free-text fields.
Configure venue, rooms, travel, and offsite locations
- Open Venue & Rooms in Settings and select or create the correct venue.
- Add rooms with attendee-facing names that match signage and the schedule.
- Under Travel, add approved hotels, directions, and transportation notes.
- Use Program → Offsite for separately managed activities that need their own location, time, capacity, or public visibility.
- Compare the saved venue and room names with the public event and schedule.
For virtual or hybrid events, do not invent a physical venue merely to satisfy a form. Set the correct format and use the virtual-session workflow described in the program how-to.
Configure tickets and registration availability
Tickets define what an attendee can select. Event-level registration controls define whether the flow is open, while each ticket can also have its own price, quantity, role, sale window, and special purpose.
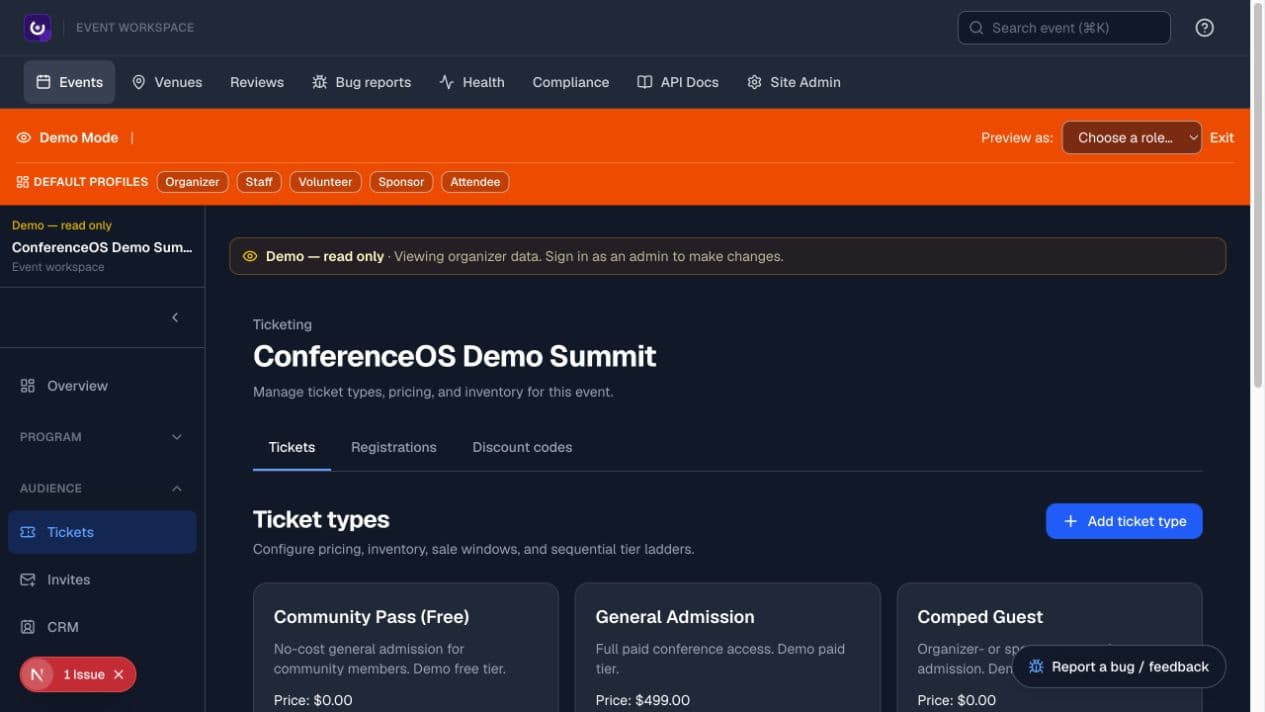
Figure 3 — Ticketing shows price, inventory, sale windows, sold counts, checkout holds, and tier relationships for the current event.
- Open Audience → Tickets or the Tickets section in Settings.
- Set total event capacity and the registration-open state.
- Create each ticket type with a clear name, description, price, quantity, and attendee role.
- Set optional sale-start and sale-end times. A missing start means the ticket becomes eligible when event sales open; a missing end leaves it eligible until another availability rule closes it.
- Mark scholarship, complimentary, or virtual ticket types only when that is their real operational purpose.
- Save, then test
/events/<event-slug>/registerin the same payment mode the event will use.
Expected result: an eligible ticket appears only while both event and ticket availability rules allow it and inventory remains. A paid selection still requires a valid checkout result before registration is confirmed.
Prices, refunds, transfers, complimentary access, and live payment-provider operations have customer or financial effects. Review the event, amount, recipient, provider mode, and result before confirming them.
Publish policies and attendee guidance
- Open the Settings policy section.
- Review Terms of Service, Privacy Policy, Refunds & Transfers, Code of Conduct, and Accessibility content for this event and operator.
- Publish only owner-approved legal and policy text.
- Add event FAQs in Knowledge Base and publish only answers safe for the attendee-facing agent and public experience.
- Configure Convince Your Boss content when the event offers that public planning aid.
- Test
/events/<event-slug>/policiesand each linked policy signed out.
ConferenceOS supplies a publishing surface, not legal advice. Do not describe placeholder or unfinished policy controls as complete.
Add tracking, domains, embeds, and integrations safely
- Tracking & Pixels stores approved measurement identifiers and custom snippets. Use only identifiers authorized for this event and consent model.
- Custom domain records the event hostname. DNS and provider verification are separate operator actions.
- Embeds create controlled schedule or event snippets. Test the allowed origin and public output before distribution.
- Integrations expose configuration status and event-level controls. A visible control does not mean its server credential exists.
Never paste secret values into public copy, documentation, screenshots, or fields that are not explicitly secret-management controls.
Run the signed-out publishing check
Before announcing the event:
- Confirm event name, slug, dates, timezone, format, venue, rooms, and contact.
- Review branding, public sections, header, footer, policies, travel, and FAQs.
- Verify tickets, quantities, sale windows, payment mode, and registration confirmation.
- Confirm the schedule is intentionally draft or intentionally published.
- Open the entire public journey in a signed-out browser: event home, registration, confirmation, schedule, speakers, sponsors, policies, and accessibility information.
- Repeat the most important journey at mobile width and with keyboard-only navigation.
- Record and assign any warning; do not dismiss it merely to make a checklist appear complete.
Troubleshoot setup and publishing
- The public page says coming soon: verify event lifecycle status and the visibility of the relevant section.
- A ticket does not appear: check event sales state, ticket sale window, quantity, holds, role, and whether an external ticket URL replaces checkout.
- A schedule is hidden: confirm the schedule publish state and that the session itself is public.
- Branding did not change: confirm the save result, refresh signed out, and distinguish organization defaults from event overrides.
- A custom domain does not resolve: verify the saved hostname, DNS, provider assignment, and certificate state; a saved field alone cannot complete DNS.
- A setting is missing: confirm the account's event permission and whether the feature is applicable to this event type or enabled installation.